The four finishing options we will cover in this post are:
1. Hook and loop

Hook and loop or more commonly known as velcro is a common finishing option for fabric banners. One of the most common use cases is on pop up displays where the banner is attached to the frame with the hook and loop finishing.
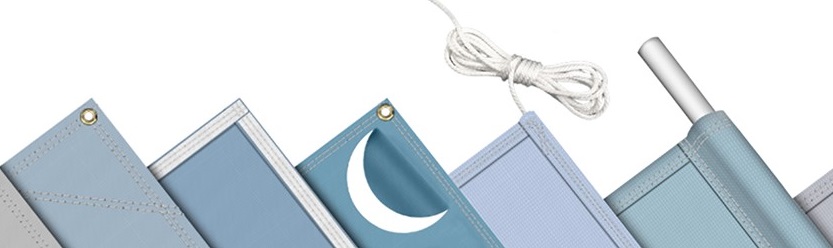
2. Webbing and eyelets
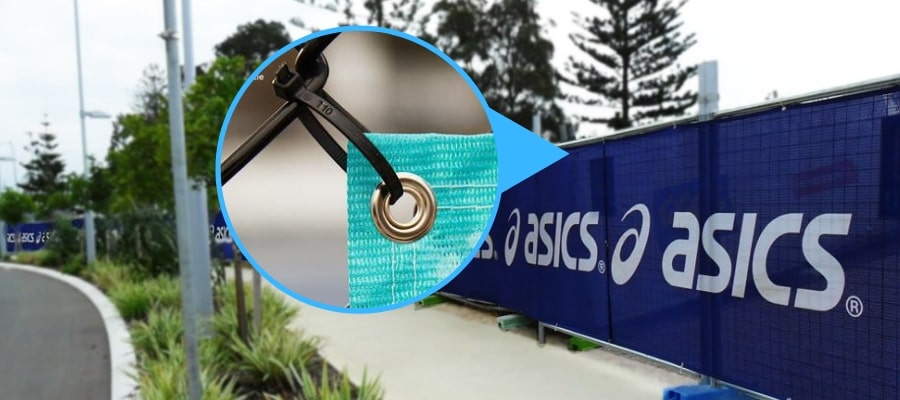
Finishing a fabric banner with webbing and eyelets is a popular option when attaching banners to fences. These fences include temporary fences, cyclone fences, and crowd control barricades.
To attach the banner to the fence, cable ties are used which go through the eyelets and around the fence. Webbing is also used to reinforce the banner which prevents it from ripping apart during rough wind conditions.
3. Silicone edging
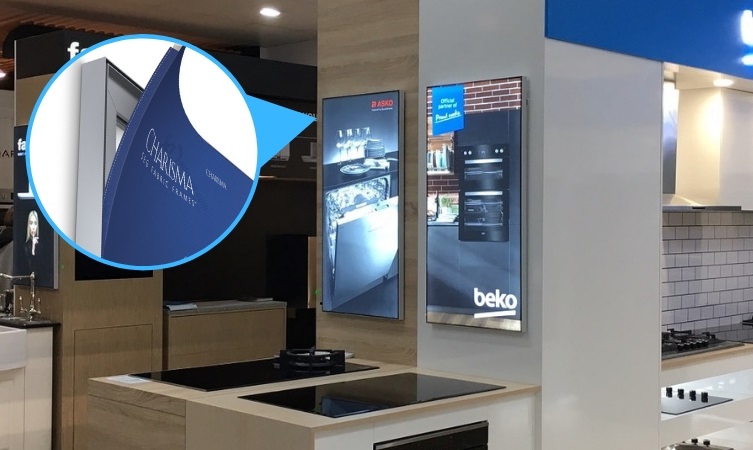
Finishing a fabric banner with silicon edging is the preferred option for fabric frames. The silicone edge is fitted into a recessed groove around the aluminium frame. By doing this, it stretches the fabric print which gives the banner its seamless upscale look.
Another product with a similar finishing is our TRIGA product range. A 20mm x 3mm rubber trim is sewn to the top and bottom of the fabric print. This allows it to be fitted into the TRIGA frame which is almost similar to how you would fit the print to the fabric frame.
One of the advantages of a TRIGA frame vs a normal fabric frame is the TRIGA can be tensioned which stretches the fabric print without relying on having the exact dimensions. The TRIGA system minimises the room for error on both the printing company and the client because if either one gets the dimensions wrong, the print won’t fit seamlessly into the frame whereas with TRIGA, both parties can be few centimetres shorter or longer and the print will still fit.
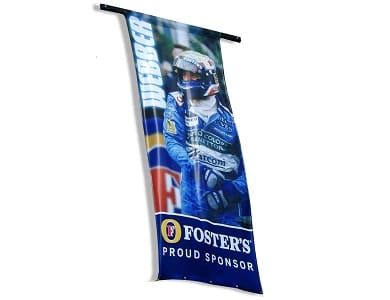
4. Sleeves and rods
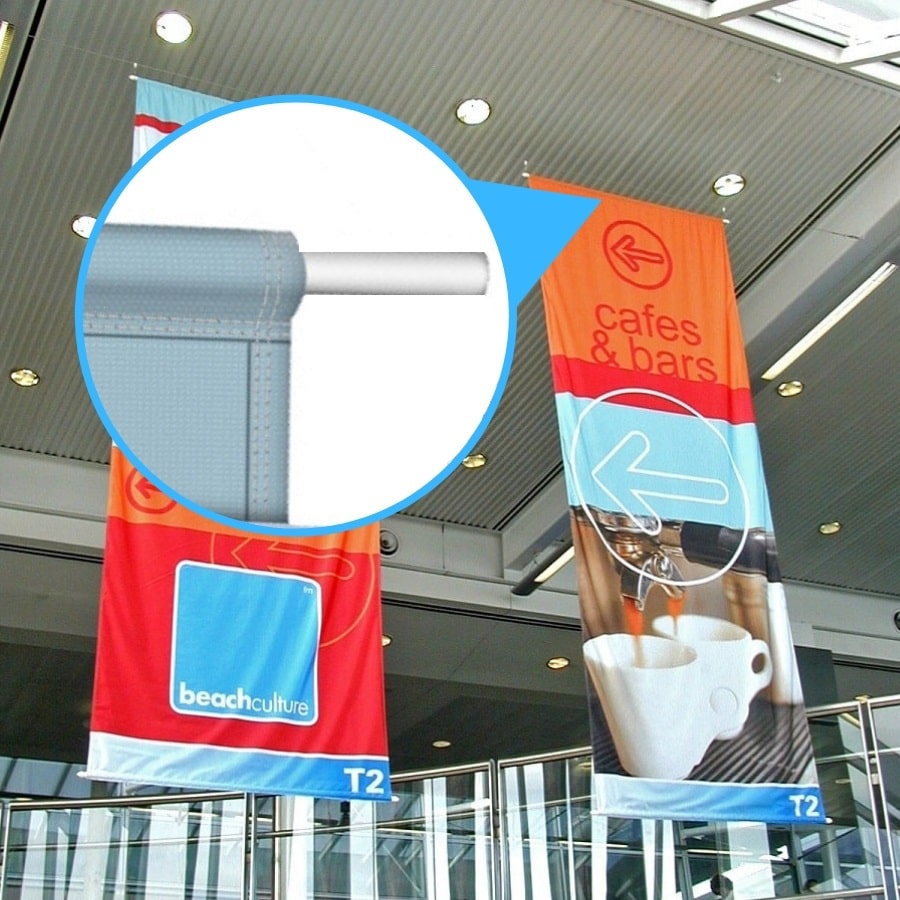
Fabric banners are finished with sleeves and rods when it needs to be hung from a ceiling. These hanging banners are commonly used in an indoor environment such as retail stores, shopping malls, trade shows, and conferences.
First, the fabric is folded to the back side and then sewn. This creates a pocket that allows a rod to slide through. Pockets are created on both the top and bottom edges of the banner. Rods are inserted on both the top and bottom pockets. The rod in the bottom pocket is used to add extra weight to the banner. The extra weight stretches the banner and gives it a less saggy look.
Learn more about fabric banners